The Queen’s Diamond Jubilee
A celebration surely to remember.
Since this is the year of the Queen’s Diamond Jubilee across the world in England, a 60th birthday falling in the same year would naturally have to be a jubilee of its own.
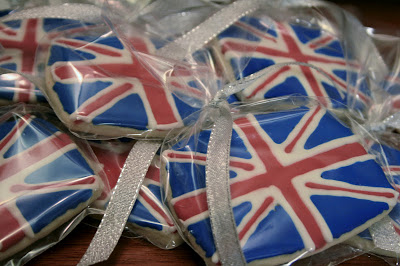
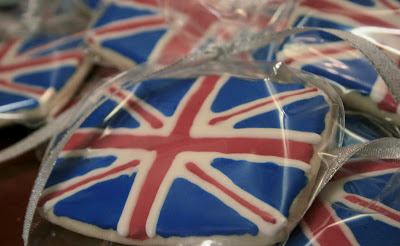
I made these fun Union Jack cookies for my Aunt Peggy’s 60th Birthday High Tea Jubilee and it surely was a labor of love.
Every time I make decorated sugar cookies, I forget how freakin’ long it takes! Sheesh!
I am no wiz at decorating cookies (and as you can see I could definitely use some more practice with straight lines) so it probably takes me a lot longer than others.
So I guess this is just a warning, These cookies turn out really fun and festive and really aren’t that hard but make sure you have time! I do it over a couple days actually to split it up a bit. It works. 🙂
To make these cookies:
I actually just made my own cookie cutter since it was just a rectangle. I love the little Make-Your-Own-Cookie-Cutter Kit I got last year. I have the exact one shown below. It really is awesome for saving time and money. Plus it really is a lot easier than you think.
 |
After I made the cookies (recipes below) and allowed them to cool, I stacked them in between layers of parchment paper in an airtight container until I was ready to decorate them.
The next day I made the royal icing. I thinned it out to a medium consistency and separated into 3 bowls. Using water-based coloring gel, tint the icing to the desired color. I used 1 and a half bottles of no-taste red gel to get it red and not pink. I didn’t have to use as much blue.
Put them in squeeze bottles and go to town.
I drew in the red, then white, then blue. I did the red on a bunch of cookies so they could start to dry a bit and then went back and did the blue, etc. The trick is getting straight lines and not bleeding. I thinned my icing a little too thin and it caused me some issues but it was a little later than I would have liked so I went with it. They turned out pretty cute all the same. Don’t ya think?!
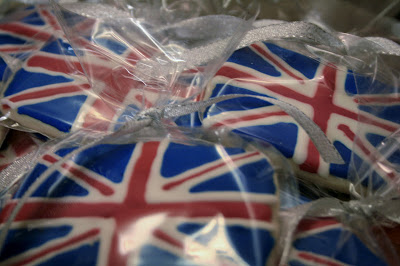
Since these cookies were party favors, I put them in an individual bag and tied it with a silver ribbon representing the diamond. Fer cute!
Cheers then.
Rolled Sugar CookiesYields: 2-3 dozen 3 inch cookies depending on thickness
Ingredients:26.5 oz (6 cups) flour3 tsp baking powder2 cups unsalted butter2 cups sugar2 eggs2 tsp pure vanilla extract1 tsp saltDirections:Mix together the flour, baking powder and salt. Set aside. Cream
the butter and sugar in a stand mixer. Add in the vanilla and eggs one
at a time mixing thoroughly. Gradually mix in the dry ingredients. This
is a pretty hefty dose of dough for a mixer so make sure yours is up to
the task. I’m not buying you a new one. Mix until the dough comes
together or your mixer starts to smoke. (I’m just kidding…it’s not
that bad.)You can choose either of the next steps. They will both work fine.Method #1: Place your dough in plastic wrap and flatten into a
rectangle. Chill your dough until thoroughly cold (more than 3 hours but
preferably overnight. Roll out and cut cookies with cutters.Method #2: Preheat oven to 350 degrees. Roll dough out onto a
floured/sugared surface until desired thickness. (1/4-1/2 inch thick)
These cookies will basically stay the same thickness you roll them. Cut
the dough with cookie cutters and using a thin metal spatula, transfer
the shapes onto an ungreased cookie sheet placing about 1 inch apart.
There is no need for parchment paper or pam or anything and in all
actuality I have found that these methods cause the cookies to spread
more….makes sense. Place your cookie sheet in the fridge and continue
onto filling the next cookie sheet. By the time you reroll and place the
cookies on the next cookie sheet, your first batch of dough will be
chilled enough to slide into the oven!*I actually use a combination of the methods above: I put the dough
in the fridge until just slightly firm (less than an hour…probably
while I clean up my mess) and that makes it a bit easier to roll out and
not stick as much. Then I proceed with method 2. *Note: You want sugar cookie dough chilled thoroughly before going
into the oven so it will hold its shape. If the dough is not cold, the
butter will melt too quickly and cause the cookie to melt and spread
before the structure of the cookie is set up. Chilling does a great job
of preventing this.Bake at 350 degrees for approximately 10 minutes for a 3-4 inch
cookie or until the cookie looks dry on top. Your cookies should not
brown. They will stay a beautiful pale color if you cook them
correctly. If your cookies start to brown, take them out! If they are
brown….you’ve gone to far. If they are darker than brown, then you
have probably already smelled the smoke. I cook 1 sheet at a time
because I use method number 2 above and it just works out wonderfully
but you can cook 2 sheets at a time if needed.
Royal IcingBy Sweet Dani BYields: 5 cups1/2 cup meringue powder1 cup cold water2 lb powdered sugarFood coloring (water-based)Make sure you have a very clean glass or
metal bowl to make your icing in. Using a strong handmixer and the beater
attatchment, beat together the meringue powder and the water until you
see good trails where the beater has been. Using a beater attachment instead of a whisk will decrease the amount of bubbles you create by a lot! Slowly beat in sugar until
well blended and you see trails again. This icing will be pretty
stiff. At this point you can separate any amount that you would like to
keep for a stiffer icing for piping borders and such. {I did not do this and probably should have this time}Thin the rest of your icing with a small amount of water until it is the right consistency.Note: The key to royal icing is to get it to the right
consistency so that it will smooth out on the cookie but not spill all
over the sides. To test your mixture, make some trails from the mixer
and then give the bowl a jiggle and see if the trails settle. They
should settle slowly after light jiggling. If not, then it is going to
be too thick for flooding. Continue to mix in water if needed. If you
have put so much water in that it no longer makes trails that stay then
you might need to thicken it up with some powdered sugar.You can use a stiff icing to pipe borders and then use a very
thin icing to flood the cookie or use a medium consistency and do
it all with one icing. I tend to do this more often.Separate the estimated correct amount of
icing needed for each color into separate bowls and color with a
water-based food coloring until you get your desired colors.Put the icing in separate squeeze bottles.


