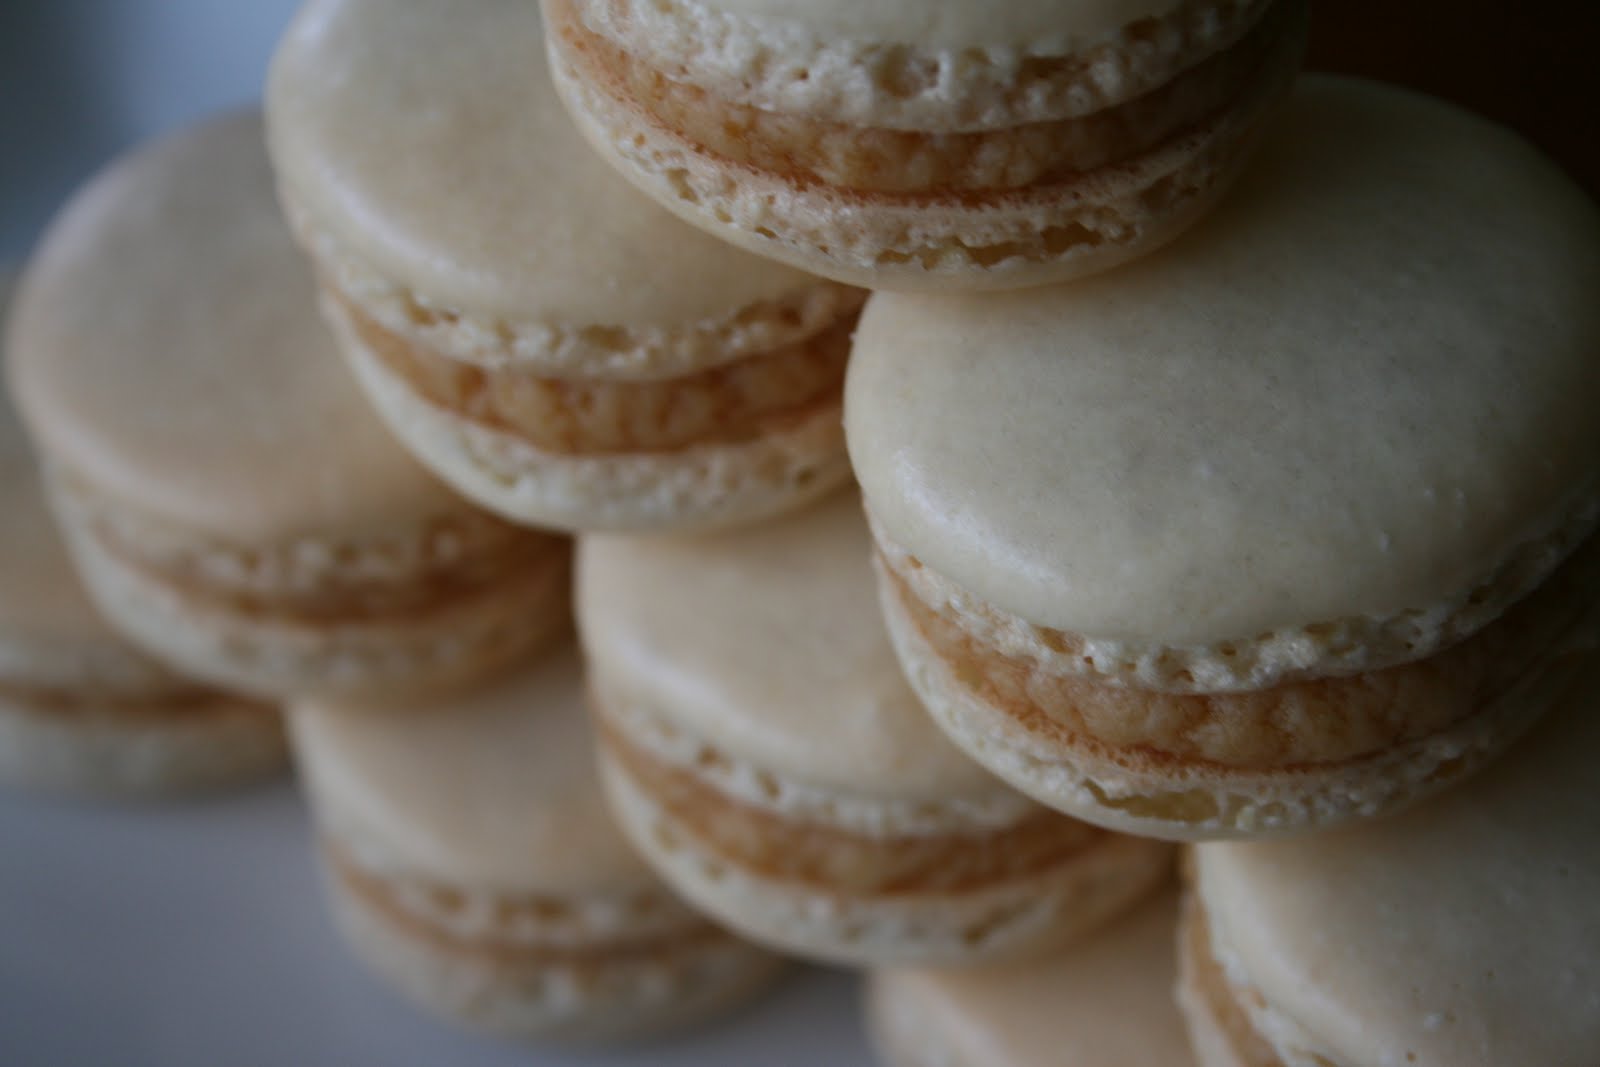
The famous (or should I say infamous?) Salted Caramel Macarons!
What little beauties. I love how contrasting yet complimentary these sweet and salty gems are. The perfect treat!
Here is the recipe that I used for the macarons shown above:
Salted Caramel French Macarons
2016-09-21 20:42:19
Almond Macaron Shell
- 120 g almond flour
- 200 g powdered sugar
- 100 g egg whites (preferably aged 3-4 days and at room temperature for 12 hours or more)
- 35 g granulated sugar
Salted Caramel Cream Filling
- Ingredients
- 250g Fresh Cream
- 350g Granulated (castor) Sugar
- 10g Fleur de Sel
- 350g Butter
Instructions
- You do not need to preheat your oven yet (FYI). Start by lining 2 or 3 thick aluminum baking sheets with parchment paper. Place your macaron template underneath the parchment paper. If you do not have a macaron template, I would strongly encourage you to make your own or find one on the internet. The circles should be around 1 1/3 to 1 ½ inches wide.
- Set up your large piping bag with a plain round tip such as Wilton #12. You can prop the bag up in a tall glass and cuff it over the edges if you need help when filling it.
- Weigh out all your ingredients and prepare according to the directions below.
- Combine your almond meal and powdered sugar and stir until distributed evenly. Sift together into a large bowl. Discard any pieces that cannot pass through the sieve.
- Weigh out your egg whites into your large stainless steel mixing bowl. Add a big pinch of cream of tartar. Weigh out the granulated sugar.
- Beat the eggs on a medium speed. You may use either a hand mixer or a stand mixer with the balloon whisk attachment. Either way works as long as you use the appropriate technique. Beat until the egg whites get pretty foamy and then start sprinkling in your sugar. Once all the sugar is in, scrape down the side of the bowl once and increase the mixer to the highest setting. We want to achieve a stiff, glossy peak.
- Once you reach stiff peaks, stop the machine and walk away. Resist the urge to give it an extra 30 seconds ‘for good measure’.
- Sift 1/3 of your almond mixture over your egg whites. Using a large clean silicone spatula, fold 3-5 times. Sift another 1/3 and fold 3-5 times. Sift the last 1/3 over your egg whites and fold until mixture is smooth and not streaky. This is an important part. Overmixing your batter is very bad for macarons (hard to pipe, thin and crispy, won’t always look like macarons) so go slowly and pay attention. You want your batter to be dense and smooth but not super chunky and thick. It will 'ribbon' off of the spoon when it is correct. You also don’t want it to be runny so there is a happy medium you need to achieve. To test, lift up your spatula with some batter on it and let it drop into the bowl. The dropped batter should settled into the rest of the mixture after several seconds. If it doesn't, give the batter a few more turns and test again.
- Transfer your batter into the piping bag with your tip in place. Pipe 1 1/3 inch rounds onto your sheet pan by placing the tip just above the surface and squeezing the top of the bag straight down until you have filled the circle. Once the circle is filled, pull up slightly and sweep the tail to the side in a circular motion.
- The piped rounds will spread a little so give them space. When you are done, remove your templates. Please don’t cook them.
- Rap the pan firmly on the counter straight up and down 3-4 times (pinch the parchment to the pan so it doesn’t slide).
- Preheat your conventional oven to 300 degrees.
- Allow your rounds to rest until it forms a slight skin and is no longer tacky, about 30 minutes, depending on your climate. They are ready to bake when you can touch them lightly and no residue comes off on your finger. Don't let them sit too long or they could turn out lopsided. In arid Utah, it takes no more than 30 minutes.
- Stack your piped pan on top of another pan. Ideally you would bake one sheet at a time for the optimal heating experience, but you can place your pans on the closest racks to each other and rotate the trays half way through baking if baking multiple trays. Don’t skip the rotating part or your bottom tray will look like a bunch of mini volcanos. Bake for 12-18 minutes until the top of the macarons are hardened and it peels of the parchment paper relatively easy. When the macarons are done they should not be crispy all the way through. They should have a crisp shell with a chewy interior (it may looks a little moist right out of the oven) without any air pockets or hollows.
- Let them cool on the sheet pans completely. Match up pairs of macarons with the same size. As soon as possible, place a dime size amount of filling in the center of the macaron and top with the other cookie. The filling should not be squishing out the side when you press together.
- If you can resist, place your macarons in an airtight container and let them rest in the fridge for 24-48 hours at least and even up to a week. This is called “maturing” the macaron and gives the cookie an awesomely delicious flavor infused chewy inner texture.
- For storage, always keep in an airtight container or the shells will get hard and gross. The fridge is the best place to keep them really fresh. Take them out about 30 minutes to an hour before you want to eat them.
To Make the Salted Caramel Cream Filling
- Cut your butter into small cubes. Weigh your sugar into a medium saucepan.
- Weigh your cream into a small saucepan and bring to boil, remove from heat as soon as it starts to boil. Cook your sugar over medium heat stirring occasionally to ensure that it caramelizes evenly and does not burn. If sugar crystals have stuck to the side of the pan, wash them down with a pastry brush dipped in water as soon as possible. When the sugar reaches a dark brown/ reddish color remove it from the heat and slowly pour in the hot cream while continuing to stir. Be careful because this can produce lots of steam and steam can burn!
- Let the caramel cool to around 45°C and then add the butter a few pieces at a time whilst mixing the caramel. Stir in a small amount of the fleur de sel and add to taste. You should use most of it.
- Pour the caramel into a shallow container and allow to cool on the counter overnight or in the fridge. Beat the caramel mixture vigorously until light, shiny and smooth. You made need to place it over a small amount of heat to loosen it up and allow it to become really smooth.
- This does not keep well so try to use it immediately. Come on….it’s caramel.. You can find a use for it.
Share Dessert Co. htpps://sharedessertcompany.com/
I do have a different recipe for a Fleur de Sel Caramel Filling that is not a cream. Just caramel. Mmmmmm…
Sara, I find myself drooling over all your yummy treats…are you willing to share recipes? pretty please with a cherry on top 😀
Haha…You can definitely have the recipes! They are no secret. The only reason I don't post them is because I am lazy and usually don't have them typed up yet when I post. 🙂 If you want a recipe just let me know which one and I can send it along. 😀 I really should be organizing my recipe folder so this may just give me motivation to actually do it. 😀 I'll send along this one…..any others??
you are AWESOME! you do such a good job and so fancy too. I for sure want this recipe and some of your cupcake ones too. I am on this cupcake kick lately and cant find a good place to get them from here since we dont have a "Sweet toothfairy" here;). Thanks your the best!